
FortiGate Remote Access (SSL–VPN ) is a solution that is a lot easier to setup than on other firewall competitors. Here’s how to setup remote access to a FortiGate firewall device, using the FortiClient software, and Active Directory authentication. This is what my topology looks like;
Note: I’ve changed the FortiGates default management HTTPS port from 443 to 4433 (before I started). This was to let me use the proper HTTPS port of 443 for remote access SSL VPN. I suggest you also do this, as running SSL-VPN over an ‘odd’ port may not work from some locations. See the following article;
Certificate: I’m also using a self signed certificate on the FortiGate, in a production environment you may want to purchase a publicly signed one!
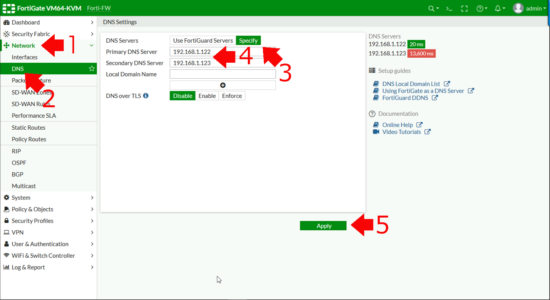
Before we start, we need to make sure your firewall can resolve internal DNS. (Because the Kerberos Certificate name on your Domain Controller(s) gets checked, when doing LDAPS queries, if you DON’T want to do this then disable server identity check when you setup your LDAP server below). Or you can add the IP address to the servers Kerberos certificate as a ‘Subject Alternative Name‘ but thats a bit bobbins IMHO
Network > DNS > Specify > Add in your ‘Internal” DNS servers > Apply.
To perform LDAPS the FortiGate needs to trust the certificate(s) that our domain controller(s) use. To enable that you need a copy of the CA Certificate, for the CA that issued them. At this point if you’re confused, you might want to run through the following article;
So to get a copy of your CA cert on a Windows CA server use the following command;
certutil -ca.cert My-Root-CA-Cert.cer

To ‘Import‘ the certificate into the Fortigate > System > Certificates > Import > CA Certificate.
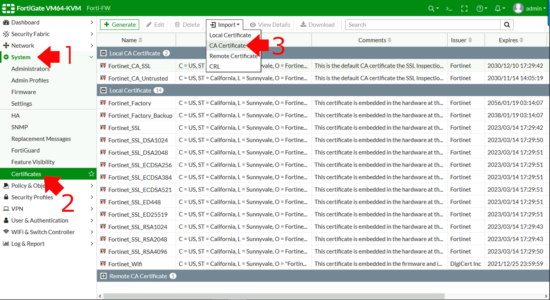
File > Upload > Browse to your CA Certificate > Open > OK.

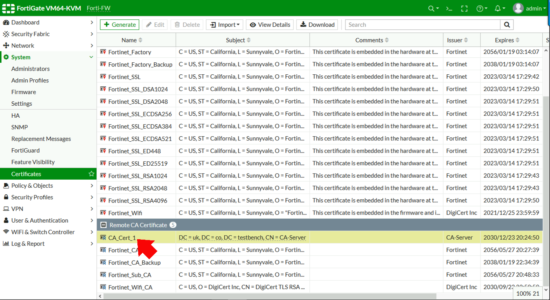
Take note of the certificate name, (CA_Cert_1 in the example below,) you will need this information below.
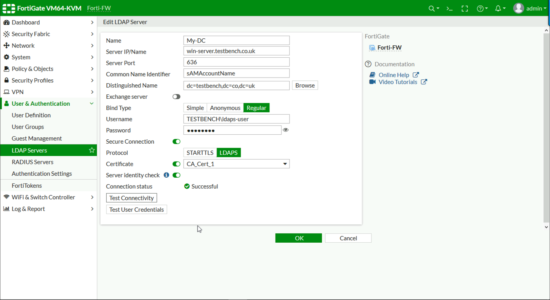
User & Authentication > LDAP Servers > Add.

Click ‘Test Connectivity‘ It should say successful, then you can check some other domain user credentials as a test > OK.
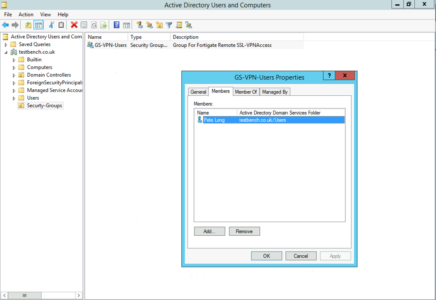
Over in my Active Directory I’ve created a security group called GS-VPN-Users, and put my user object into it.
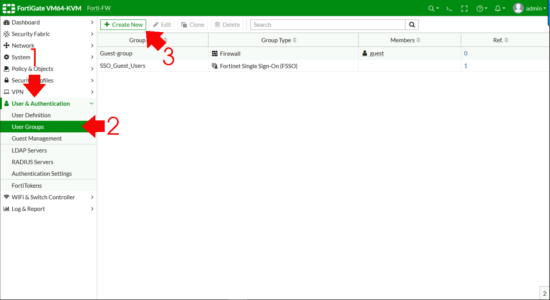
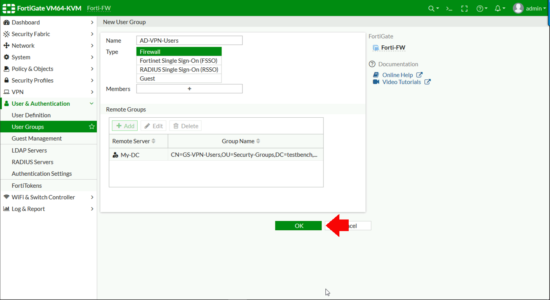
Now I need to create a FIREWALL GROUP and add my ACTIVE DIRECTORY GROUP to that. User & Authentication > User Groups > Create New.
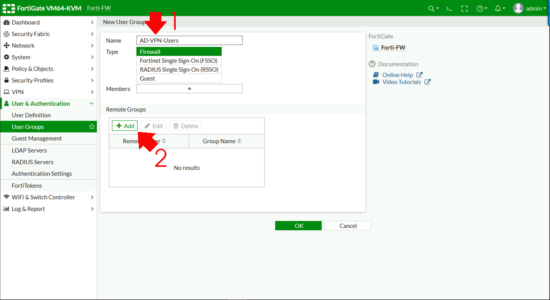
Remote Groups > Add.
Change the Remote Server drop down list to be your LDAPS Server > Browse to your ACTIVE DIRECTORY GROUP, right click and Add Selected (Cheers, that took me three goes to find FortiNet!) > OK.
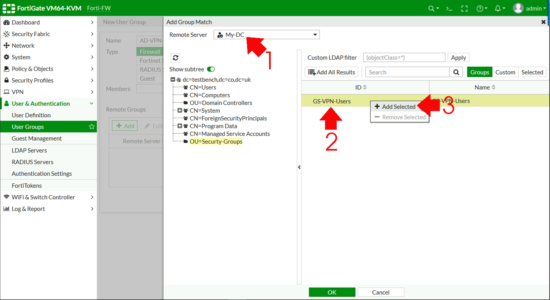
All being well you should see your LDAPS server AND the distinguished name of your AD group, (check that’s not missing!) > OK.
First we need an SSL Portal > VPN > SSL-VPN Portals > Create New.

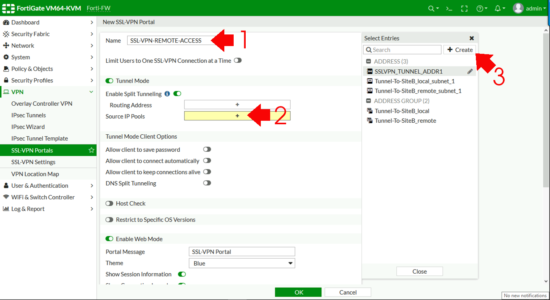


Enter a portal message, (the header on the page once a remote user connects) > Enable FortiClient download > OK.

If you see the following error, that’s because on some smaller firewalls, (like the 40F) there can only be one, so you need to edit the one that is there by default.
Maximum number 0f entries has been reached.

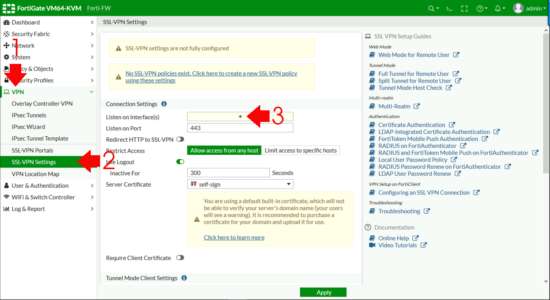
VPN > SSL-VPN Settings > Listen on Interfaces.
Set to the outside (WAN) interface > Address Range > Specify custom IP Ranges > IP Ranges > Add in the pool you created above.
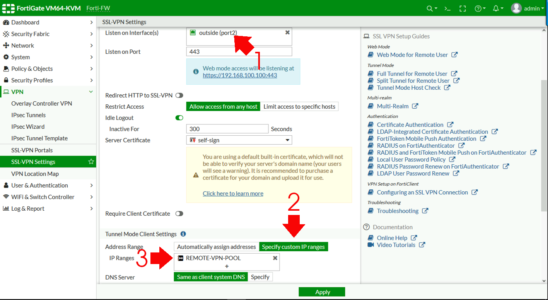
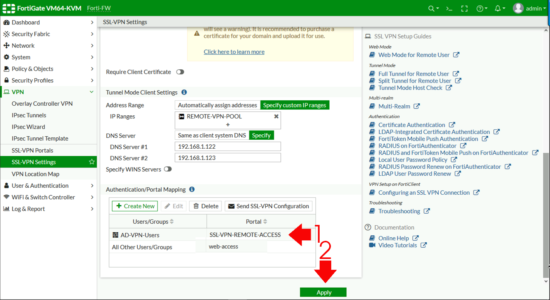
DNS Server > Specify > Add in your internal DNS servers > Authentication Portal Mapping > Create New.
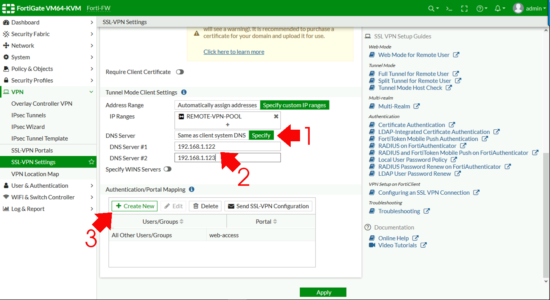

Apply (Note: If it complains ‘All Other User/Group‘ is not configured, set that to web-access (as shown).
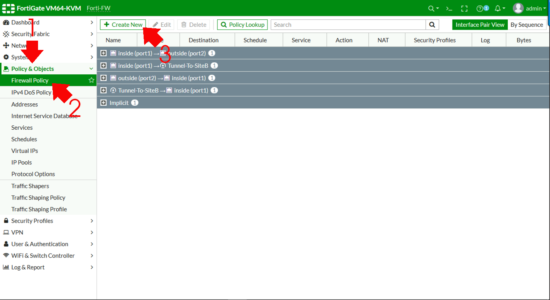
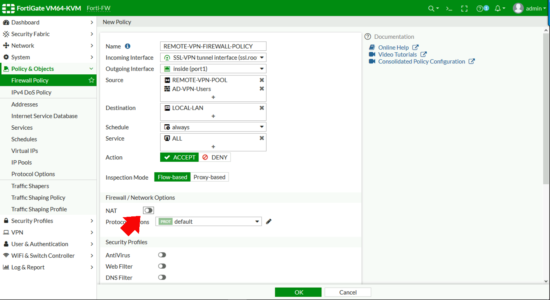
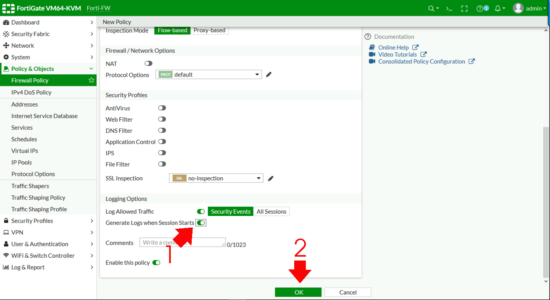
Policy & Objects > Firewall Policy (or IPV4 Policy on older versions) > Create New.
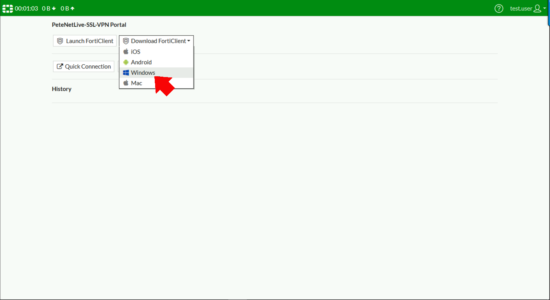
From your remote client, browse to the public IP/FQDN of the firewall and log in, you should see the SSL-VPN portal you created, and have the option to download the FortiClient (VPN) software for your OS version.
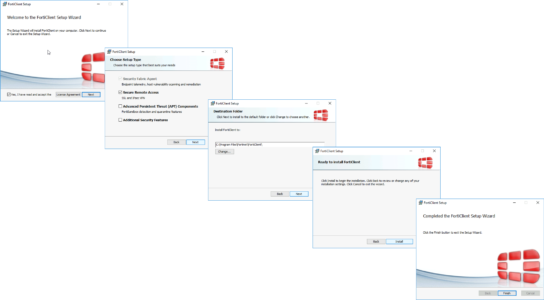
Install the FortiClient (Note: This is only the VPN component not the full FortiClient).
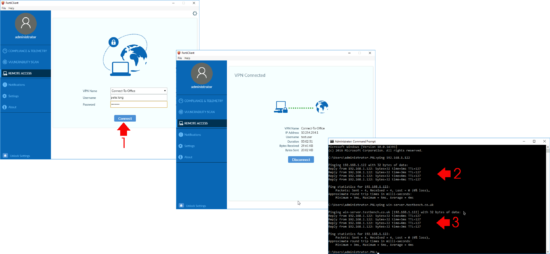
Remote Access > Configure VPN.

Then test connection, make sure you can ping internal IP addresses and DNS names.
Author: PeteLong